


If you want your Moneypenny messages to drop into Microsoft Dynamics as leads you can jump straight to our Zapier template by clicking here. If you wish to do something else with the integration, the below is one example of what you can do with other options available, so see what works best for you.
In this blog post we’ll talk you through the process of setting up a Moneypenny trigger and action to complete your Microsoft Dynamics CRM integration.
Tips on terminology:
- Zap – a workflow process created within the Zapier platform to connect the apps you use day-to-day e.g. Moneypenny messages being dropped straight into your company’s CRM platform
- Trigger – an event that starts a Zap e.g. a Moneypenny message being sent from your receptionist
- Action – what you would like to happen at the end of the Zap e.g. a lead being created in your CRM platform as a result of Moneypenny messages being sent
Essentials:
- You will need a suitable Zapier account
- You must be an Moneypenny admin user
How to set up a Moneypenny trigger
All Zaps set up will require this step if a pre-built template is not being used.
1. Log in to your Zapier account and navigate to your dashboard.
2. Click ‘Create Zap’ which can be found in the top left corner of your screen.
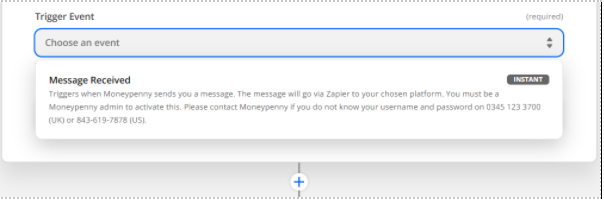
3. Search for ‘Moneypenny’ on the app event search box and select the top option, which will be the newest version. This will take you to the trigger setup box.


4. Click on the ‘Trigger Event’ box and select ‘Message Received’ and then press ‘Continue’.
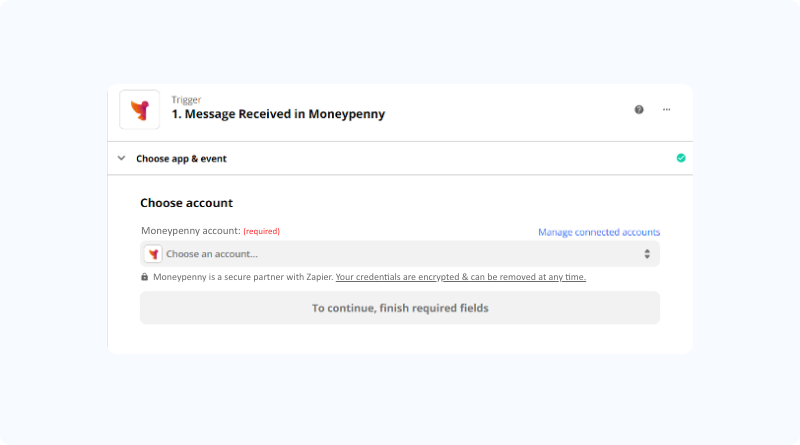
5. Choose your Moneypenny account. If your Moneypenny login details are not already stored, you will need to click ‘+Connect new account’.
6. Log in with your Moneypenny credentials (the ones you use for the app/portal) and then click continue. Remember, you must be an admin to do this.
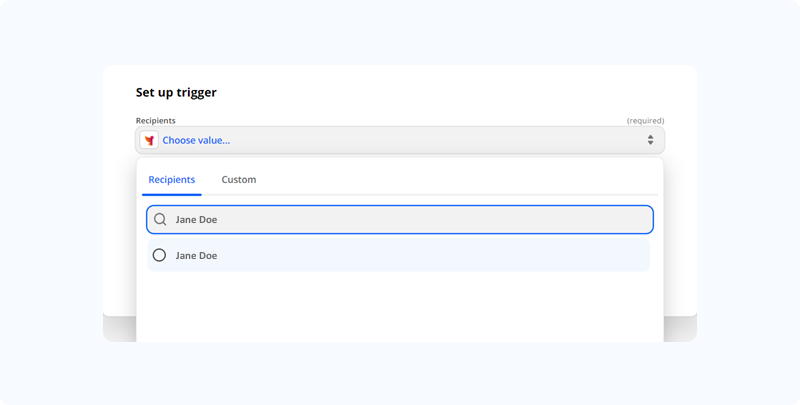
7. You will need to set up your trigger by selecting recipients. In the ‘Choose value’ box search for the name or call type that you wish to create the Zap for e.g. you may be setting up a Zap for your new inquiry calls to drop into your chosen platform. We recommend that you select just one recipient or call type per Zap set-up.
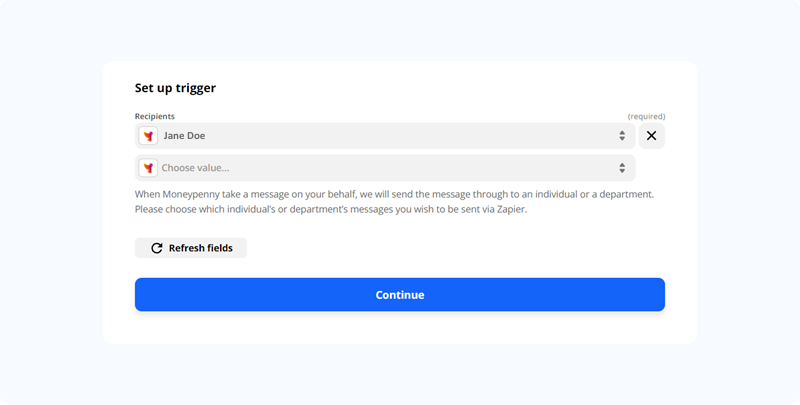
8. Once your recipient has been selected, you will need to click ‘Test trigger’. Once the test has run, click ‘Continue’ and begin adding your actions.


Microsoft Dynamics Action setup:
1. Once you have set up your trigger, you will need to create your ‘Action’.
2. Search for your chosen platform in the ‘App Event’ search box.
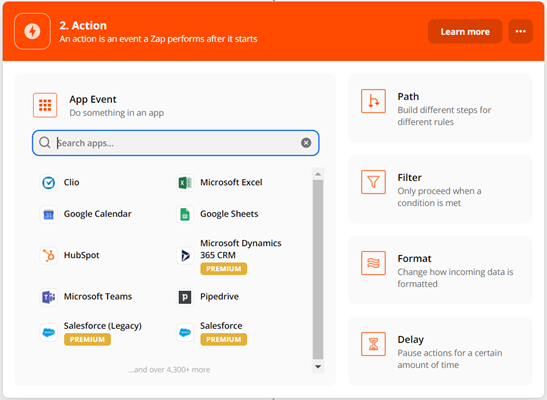
3. Select Dynamics, then select your ‘Action Event’ as ‘Create Lead’, then click ‘Continue’.
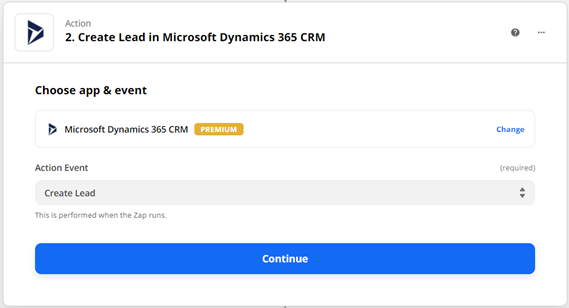
4. Log in using your Dynamics details then click ‘Continue’. If your login isn’t stored in the list when you click on the ‘Choose account’ box, you will need to click ‘+ Connect a new account’.
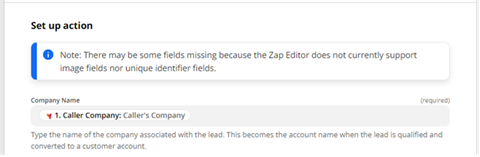
5. You will need to match up (map) the information that Moneypenny takes for you on a call, with the fields in your Dynamics account. If you have any fields marked as ‘required’ that we do not already obtain for you on a call, you will need to visit our ‘How to add a Formatter’ blog post
6. Click on the ‘Choose value’ box to be presented with a list of pieces of information that Moneypenny takes on your calls – you will need to match these. In the example below we have matched company with Caller’s Company. Once you have completed this setup, press ‘Continue’.
7. Hit ‘Test & Continue’ and you will automatically receive a test message within Dynamics. When the test is successful, you are ready to turn on the Zap and receive Moneypenny messages as leads in Dynamics.
Need a hand? Give our team a call on 866.202.0005 and we’ll talk you through the process.