


Use the portal to maximize your Live Chat
Your portal has everything you need to set up and customize your Live Chat.
It couldn’t be easier to work your way through the portal, but we’ve explained every feature for you here so it’s super-simple:
Logs
The Logs area of your Portal holds all of your Chat Logs for your widget. This list of Logs will show the date and time of the chat as well as the duration of the chat itself and the name of the Agent or Moneypenny Receptionist who took the chat.
You can also export your Logs so you can download and save all of your chat data. You can either choose to export from a pre-populated monthly report or manually from a custom export by selecting exactly which dates you want.
Analytics
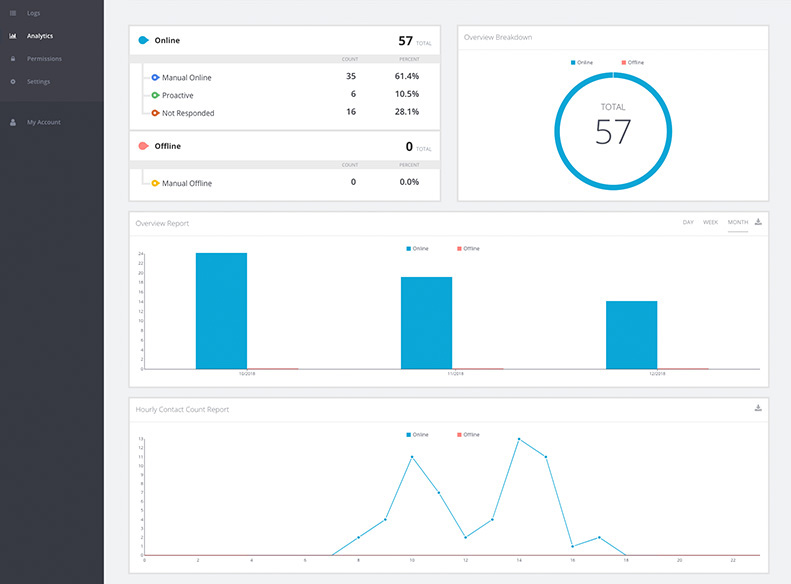
Overview
This overview will show a summary of your chat activity. You can choose to search by a specific time range or chat type, such as manual or proactive.
Your Portal will generate an Overview Report for you. This report is a breakdown of your Online contact points which can be searched for by most recent or chosen time range.
Your Portal will also create an Hourly Contact Count Report for you. This report will calculate the amount of customer contacts your live chat receives every hour.
You can choose to export any of these reports for your own records.
Visitor information
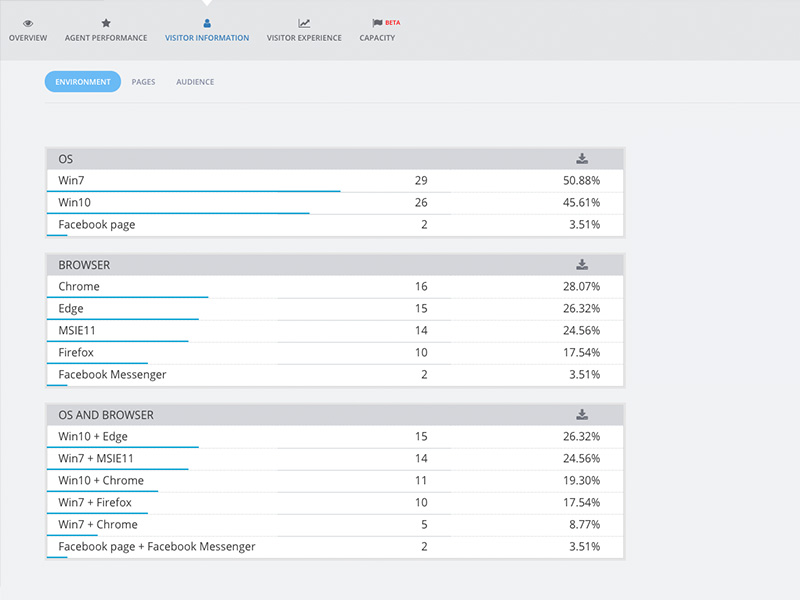
This section of the Portal is split into 3 categories; Environment, Pages and Audience.
Environment: shows the different browsers your live chat visitors are using.
Pages: shows a summary of URLs where chats were started.
Audience: shows your visitor’s language preference and location.
Visitor experience
This is where you can see an overview of your visitor’s average wait time before entering into a chat. Again, this can be categorized by a particular time range.
Settings
Get the code
This section is where you input your code and place the Moneypenny widget on your website.
Shortcuts
Within your Agent Settings tab, you’ll be able to create your own Shortcuts. These Shortcuts are canned responses for the Agent to use during a chat and can be added or edited at any time. You can also export these Shortcuts for your own records.
Configure messages
Click into your Design Studio to access your Configure Messages section. This section is where you customize all of your visitor-facing messages such as confirmation messages or visitor survey requests. These can be edited at any time.
Design studio
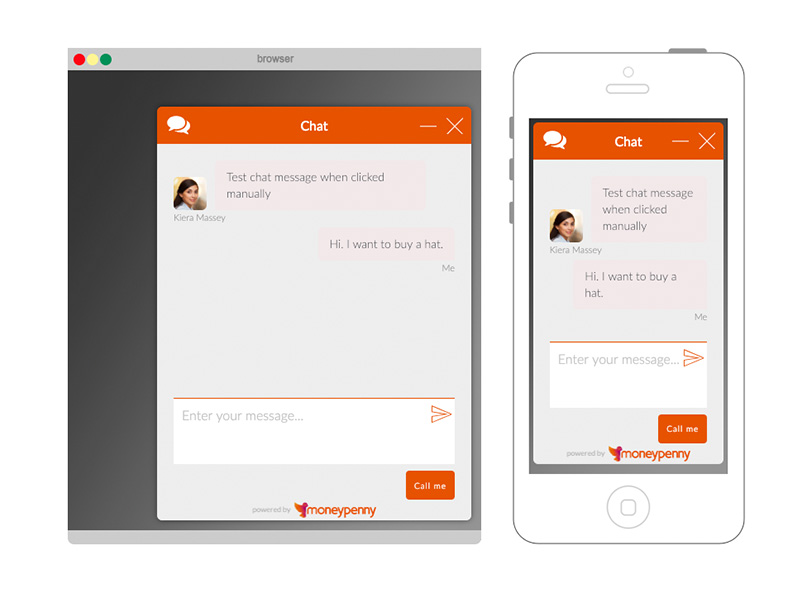
The Design Studio is where you create your chat widget, pre-chat forms and chat buttons. You can choose from a range of colors, fonts, styles and templates to ensure your live chat represents you and your business perfectly. You can design as many themes as you wish and can also go back and edit the styles at any time.
Proactive chat
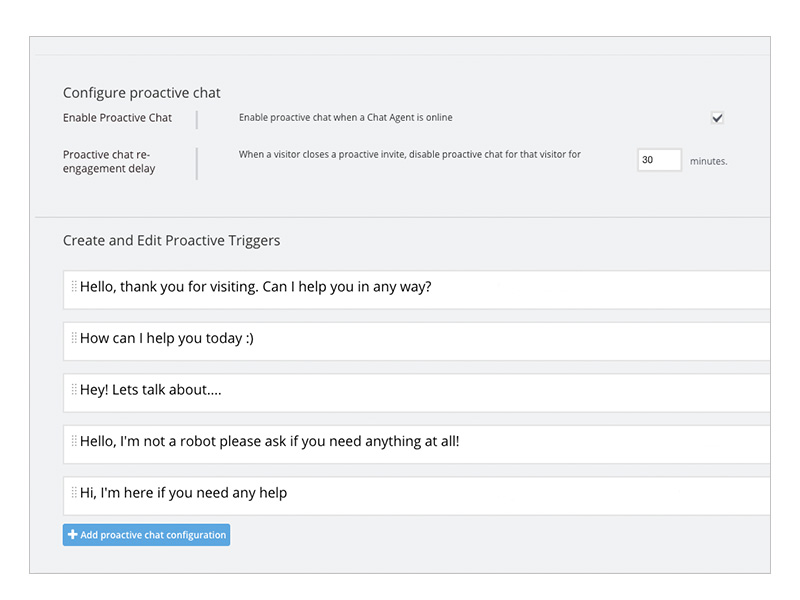
This section is where you can create, edit and configure your Proactive Chat and Triggers. Here you can enable your Proactive Chat and choose how often you nudge website visitors. You can add as many Proactive Triggers as you like and can also edit these at any time.
We know the portal will be super-useful to you and you’ll get to know its features really quickly. If you need anything explained or need any support, just pick up the phone and talk to one of our technical experts on 866.202.0005.